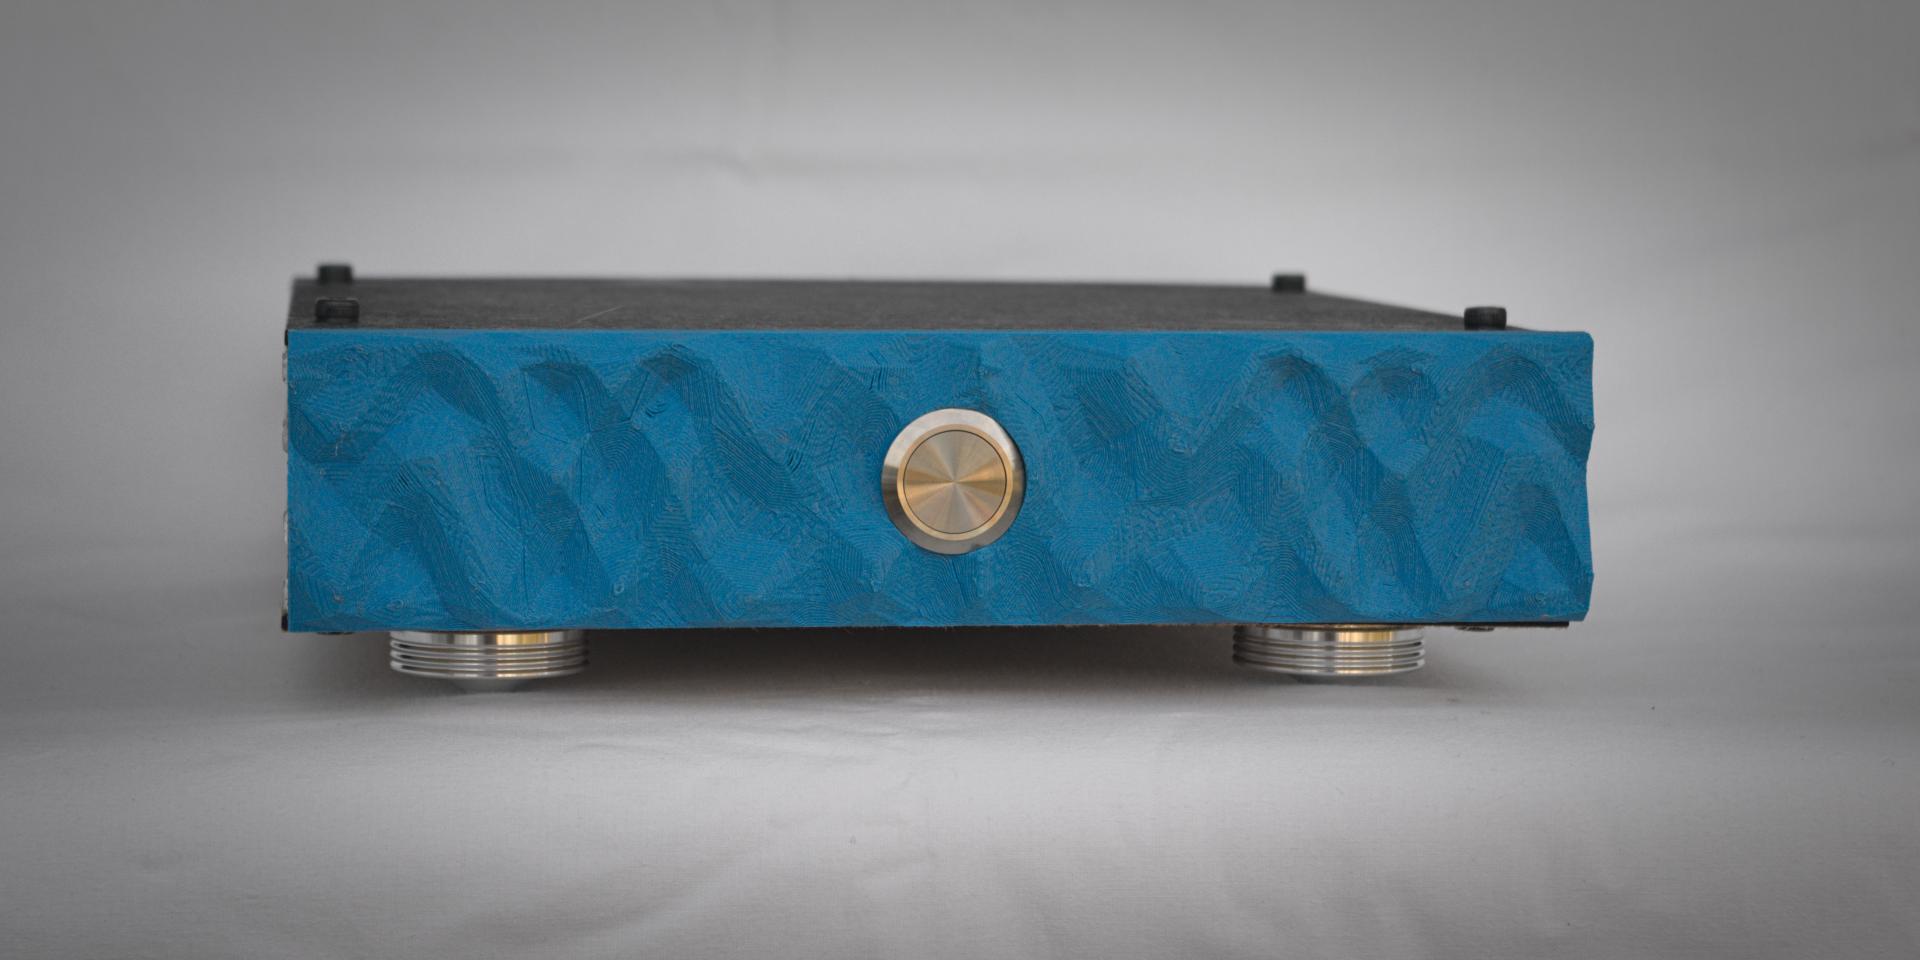
Build your own high fidelity music server.
Table of Contents
The idea of this project is to have my music library from any computer. The sound must be reproduced using my speakers and amplifier.
I also want to have a very good sound quality reproduction, I have digitized my audio CD in FLAC format. So this server must be able to read the FLAC files.
On the hardware side, I have chosen electronic components that ensure a good sound reproduction.
The case must be elegant, to measure up this project.
1 The case
The case frame consists of four aluminium rails. The rails are used to fix the six panels of the case.
For the front panel of the case, I have chosen the low poly style, an aesthetic style that is currently in vogue.This style is characterized by simple geometric shapes placed side by side to create angular compositions.
Currently, the only tool that allows me to make the piece that I have in mind, is my 3D printer Hephestos 2.
I drew the piece with CAD software. When exporting the file in STL format, the software offers the possibility to choose the resolution (a high number of polygons or not). So to get a low poly style, I decreased the number of polygons in the piece.
The disadvantage after lowering the resolution is that the bore that I planned in the middle of the piece for the push button has a shape that looks like a hexagon instead of a “perfect” cylinder .
The tool that helped me to solve this problem is Meshlab. By selecting the parts of the piece I am interested in, I get the shape I want.
The front panel is held with two glued brackets, to avoid having visible screw heads.
The other sides of the case are laser-cut medium plates (MDF), 3 mm thick.
The legs are machined solid aluminum.
2 The electronics
The embedded computer I put in the music server is a Raspberry pi 3.
For the digital-to-analog audio converter (DAC) I took a U-Saber ES9023 24bit/192kHz.
The DAC is connected to the Raspberry in I²s.
The music server must be silent so I have chosen a passive power supply, a power supply with a fanless heat sink.
The regulated linear power supply module is built with two independent circuits. This allows me to power the Raspberry and DAC separately to avoid interference.
The Transformer 220v AC to 12v DC is of the R-core type.
For the wiring there are 3, 4 soldering to do and the rest is connected with standard connectors.
A switch on the back of the case turns the server on and off.
To restart the Raspberry I use the push button located on the front panel of the case, it is connected to the RUN pins of the Raspberry.
To protect the components from overvoltages, there is a fuse in the switch. It must be sized according to the power of the devices.
With a wattmeter, I measure the maximum power consumed by the music server: 11 watts
The calculation: Current = Power/Voltage or 11/220 = 0.05 this gives a fuse of 50mA
 Inside view
3 The software
3.1 OSMC
I tried different audio software for a while, such as Volumio, Moodeaudio, Mopidy, OSMC.
OSMC which is a minimal Linux distribution based on Debian and the Kodi media player. It’s complete and it’s easy to install on a Raspberry.
What I like is the Chorus web interface that allows me to browse my albums with the covers.
With this interface I have the possibility to switch the sound distribution between the DAC of the Raspberry and my computer or another device: another detail that I appreciate.
I also use OSMC on another Raspberry for the video, and it works well.
So I chose OSMC.
Edited: April 2020
One day, using a Bluetooth speaker, it gave me an idea. Remove the OSMC media player that powers the DAC, and turn the Raspberry into a sound server. Why not?
So I set up a PulseAudio sound server on the Rpi. The advantage is that I’m not limited by the media OSMC offers (the radio and the album library). With a PulseAudio server I can broadcast directly from my computer to the Raspberry. The disadvantage is that the Raspberry is no longer autonomous, I need a “client” computer to broadcast the sound to the server.
3.2 PulseAudio
3.2.1 Server configuration
Installing the required software:
# apt update
# apt install pulseaudio pulseaudio-module-zeroconf
Define the PulseAudio service file:
nano /etc/systemd/system/pulseaudio.service
[Unit]
Description=PulseAudio Daemon

[Install]
WantedBy=multi-user.target

[Service]
Type=single
PrivateTmp=true
ExecStart=/usr/bin/pulseaudio --system --realtime --disallow-exit --no-cpu-limit
ExecStop=/usr/bin/pulseaudio -k
Start the PulseAudio service and enable it to make it start on boot automatically:
# systemctl daemon-reload
# systemctl start pulseaudio.service
# systemctl enable pulseaudio.service
To make PulseAudio available on the network, edit the following file:
nano /etc/pulse/system.pa
load-module module-native-protocol-tcp auth-anonymous=1
load-module module-zeroconf-publish
Enable I²s and sound card, fortunately, my U-Sabre ES9023 DAC is compatible with hifiberry-dac.
nano /boot/config.txt
dtparam=i2s=on
dtoverlay=hifiberry-dac
Restart the Raspberry pi, if the previous step went well you should find the following result:
aplay -l

card 0: sndrpihifiberry [snd_rpi_hifiberry_dac], device 0: HifiBerry DAC HiFi pcm5102a-hifi-0 [HifiBerry DAC HiFi pcm5102a-hifi-0]
3.2.2 Client configuration
Add the following configuration, specifying the ip address of the server :
nano /etc/pulse/default.pa
load-module module-tunnel-sink-new server=192.168.1.10 sink_name=rpi
Last step; restart the PulseAudio service:
systemctl --user restart pulseaudio.service
You should be able to see a new available audio device called: “Tunnel to 192.168.1.10”.
 Audio Peripherals
Now all you have to do is enjoy your freshly installed and configured audio system.
